Modern video productions rarely rely on a single camera. Content creators, filmmakers, YouTubers, and commercial studios often combine footage from mirrorless cameras, cinema rigs, drones, smartphones, and action cameras within the same project. While this approach improves flexibility and creativity, it introduces one major challenge: inconsistent color reproduction.
Different cameras interpret color, contrast, exposure, and white balance differently. Even two cameras from the same manufacturer can produce noticeably different results. Without proper correction, these inconsistencies can make a project feel distracting and unprofessional.
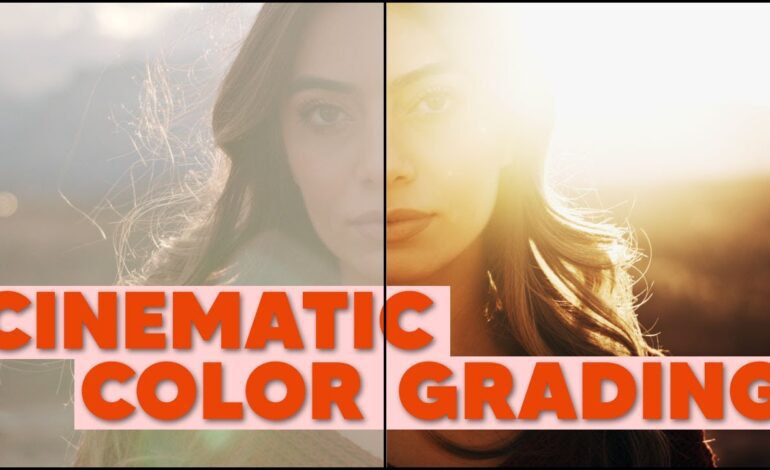
Learning how to match colors between different camera footage is now an essential editing skill in 2026. Whether you edit in DaVinci Resolve, Adobe Premiere Pro, or Final Cut Pro, the process follows a structured workflow that balances technical correction with artistic consistency.
Why Camera Footage Looks Different
Every camera sensor processes light uniquely. Manufacturers apply their own color science, gamma curves, and internal processing systems. Lens coatings, picture profiles, ISO settings, and lighting conditions also influence the final image.
Common differences include:
- Warmer or cooler skin tones
- Contrast variations
- Different saturation levels
- Green or magenta color shifts
- Highlight roll-off inconsistencies
- Uneven dynamic range
Footage captured in Log profiles may appear flat, while standard Rec.709 clips can look contrast-heavy and oversaturated. Matching these visuals requires more than applying a simple LUT.
Start With Exposure Before Color
Professional colorists always begin by balancing exposure first. If brightness levels are inconsistent, color matching becomes significantly harder.
Adjust these primary elements before touching creative grading:
Lift, Gamma, and Gain
These controls manage shadows, midtones, and highlights. Aligning brightness across clips creates a solid technical foundation.
Contrast and Pivot
Matching contrast helps footage feel naturally connected. One camera may produce softer blacks while another creates harsher shadows.
Highlight Recovery
Overexposed skies or clipped highlights can instantly reveal mismatched footage. Use highlight controls carefully to maintain consistency.
When exposure alignment is complete, the color correction stage becomes far more accurate.
Correct White Balance Differences
White balance inconsistencies are one of the most common issues in multicamera projects. One camera may lean blue while another appears yellow or green.
To fix this:
- Adjust temperature settings for warmth or coolness
- Use tint controls to remove green or magenta casts
- Compare neutral areas like gray walls, white shirts, or clouds
- Match skin tones under similar lighting conditions
Proper white balance alignment immediately improves visual continuity between clips.
Use Scopes Instead of Trusting Your Eyes
Relying only on a monitor can create inaccurate results because screen calibration varies widely. Professional editors depend on video scopes for precision.
Important scopes include:
Waveform Monitor
Helps balance luminance and exposure levels.
Vectorscope
Shows saturation intensity and color direction.
RGB Parade
Reveals color imbalances between red, green, and blue channels.
Scopes provide objective data, making it easier to match footage from entirely different camera systems.
Match Skin Tones for Natural Results
Human skin tones are the easiest way to detect poor color matching. Even subtle differences become noticeable to viewers.
When correcting skin:
- Maintain realistic warmth
- Avoid excessive saturation
- Use vectorscope skin tone lines for guidance
- Balance midtones carefully
If skin tones look consistent across clips, the audience will perceive the entire sequence as visually unified.
Convert Log Footage Properly
Many creators shoot in Log formats to maximize dynamic range. However, combining Log footage from multiple cameras can become complicated because each format behaves differently.
Popular formats include:
- S-Log
- C-Log
- V-Log
- Blackmagic Film
- RED Log3G10
Instead of applying random LUTs immediately, first transform footage into a common color space such as Rec.709 using proper color management tools.
Modern workflows in 2026 increasingly use:
- DaVinci Resolve Color Management
- ACES pipelines
- Camera Input Transform systems
These tools standardize footage before creative grading begins.
Apply LUTs Carefully
LUTs can speed up matching workflows, but they should never replace manual correction.
A LUT created for one camera may damage footage from another sensor. Instead:
- Normalize footage first
- Apply camera-specific conversion LUTs
- Reduce LUT intensity if necessary
- Fine-tune manually afterward
Professional colorists treat LUTs as starting points rather than final solutions.
Use Reference Frames for Consistency
Reference stills help maintain visual continuity throughout a project. Choose one balanced hero shot and use it as your comparison image.
Look for consistency in:
- Skin tone accuracy
- Shadow density
- Highlight brightness
- Saturation balance
- Overall mood
Most editing software now includes split-screen comparison tools that simplify side-by-side matching.
Reduce Noise Before Final Grading
Different cameras produce varying levels of digital noise, especially in low light. One clip may appear clean while another becomes grainy and distracting.
Before final color grading:
- Apply subtle noise reduction
- Avoid excessive sharpening
- Match texture levels across clips
- Add controlled film grain if necessary
Consistent texture helps footage blend more naturally.
Create a Unified Cinematic Look
After technical matching is complete, you can apply a creative grade that ties the entire project together.
Popular cinematic trends in 2026 include:
Natural Film Emulation
Soft highlights, balanced saturation, and realistic skin tones.
Clean Commercial Contrast
Bright whites, polished blacks, and vibrant product colors.
Muted Documentary Styling
Lower saturation with subtle tonal separation.
Teal and Warm Contrast
Still widely used in trailers and action sequences when applied subtly.
Creative grading works best only after proper camera matching is complete.
Mistakes That Ruin Color Matching
Even experienced editors make common errors that damage consistency.
Avoid these problems:
- Overusing LUTs
- Ignoring white balance mismatches
- Excessive saturation boosts
- Crushed shadows
- Uncalibrated monitors
- Applying creative looks too early
- Skipping scope analysis
The best color matching is often invisible. Viewers should focus on the story rather than noticing visual inconsistencies.
Best Software for Matching Camera Footage in 2026
Several editing platforms now include advanced AI-assisted color matching tools.
Top options include:
- DaVinci Resolve
- Adobe Premiere Pro
- Final Cut Pro
- Avid Media Composer
DaVinci Resolve remains the industry leader for advanced color workflows due to its professional scopes, node system, and automated color management tools.
Final Thoughts
Matching colors between different camera footage is both a technical process and a creative discipline. The goal is not simply making clips identical, but creating a seamless visual experience that feels intentional and cinematic.
As modern productions continue using multiple camera systems, mastering color consistency has become one of the most valuable post-production skills. By balancing exposure, correcting white balance, using scopes, refining skin tones, and applying thoughtful creative grading, editors can transform mismatched footage into polished professional storytelling.
In 2026, audiences expect cinematic quality across every platform — from YouTube videos to commercial campaigns. Consistent color grading is what separates amateur edits from truly professional productions.