
Creating videos consistently can become exhausting when every project starts from scratch. Many editors waste valuable time importing assets, arranging timelines, organizing folders, and adjusting repeated settings before the actual creative work even begins. An efficient video editing template eliminates these unnecessary steps and allows creators to focus on storytelling instead of repetitive setup tasks.
In 2026, content production is moving faster than ever. YouTube creators, freelance editors, marketing teams, and social media managers all rely on streamlined systems to keep up with demand. A professionally designed editing template can reduce editing time dramatically while maintaining visual consistency across projects.
This guide explains how to build a smart video editing template that improves speed, organization, and overall production quality.
Why Every Video Editor Needs a Reusable Workflow System
An editing template acts as a foundation for future projects. Instead of rebuilding your timeline structure every time, you create a pre-organized project that already contains essential elements.
A strong template typically includes:
- Organized folders and bins
- Pre-made timeline layouts
- Audio tracks and labels
- Color grading presets
- Motion graphics placeholders
- Intro and outro sequences
- Transition presets
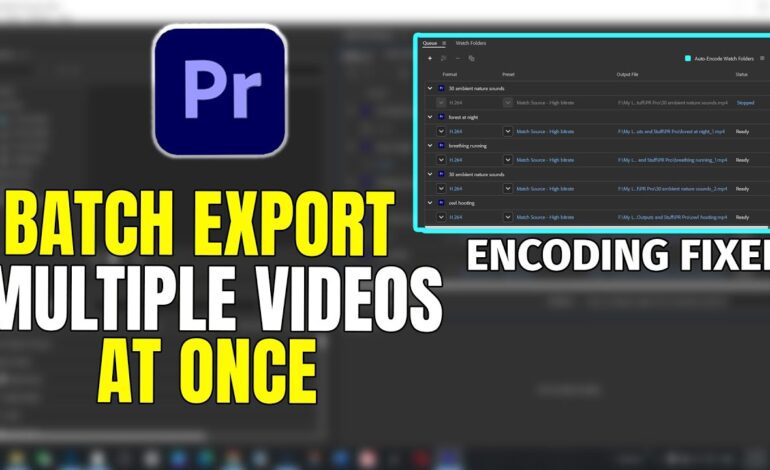
- Export settings
Using a reusable workflow not only saves time but also reduces mistakes during editing.
Editors working on recurring content such as podcasts, tutorials, interviews, gaming videos, or product reviews benefit the most because these formats often repeat similar structures.
Start With a Clean Folder Structure
Before touching your editing software, organize your project files properly. A chaotic file system slows down every stage of production.
Create a master folder template with sections such as:
Essential Folder Categories
- Footage
- Audio
- Music
- Graphics
- Project Files
- Exports
- Thumbnails
- Backup Files
This structure keeps assets accessible and prevents missing media errors later.
Using identical naming conventions for every project also helps when collaborating with teams or revisiting older edits months later.
For example:
- ProjectName_V1
- ProjectName_Final
- ProjectName_Export_4K
Consistency creates efficiency.
Build a Timeline That Matches Your Editing Style
A timeline template is the heart of your workflow. Design it based on the type of content you create most often.
Example Timeline Organization
- Video Track 1: Main footage
- Video Track 2: B-roll
- Video Track 3: Text overlays
- Video Track 4: Effects and graphics
For audio:
- Audio Track 1: Dialogue
- Audio Track 2: Background music
- Audio Track 3: Sound effects
Color-code each track to improve visibility during long editing sessions.
Professional editors often use dedicated tracks for subtitles, transitions, and adjustment layers. This prevents clutter and speeds up revisions.
Save Frequently Used Effects and Presets
One of the biggest productivity boosts comes from reusable presets.
Instead of manually adjusting settings every time, save your favorite:
Common Presets to Include
- Color correction LUTs
- Audio enhancement settings
- Zoom transitions
- Text animations
- Motion blur effects
- Sharpness adjustments
- Noise reduction settings
These presets ensure consistency across videos while reducing repetitive tasks.
If you regularly edit content for the same brand or channel, templates help maintain a recognizable visual identity.
Include Ready-to-Use Intro and Outro Sections
Many creators repeatedly rebuild intros and end screens from old projects. A better approach is embedding them directly into your template.
Your template can include:
- Channel intro animations
- Subscribe reminders
- Social media callouts
- Lower thirds
- Logo animations
- End screen placeholders
This strategy works especially well for YouTube creators publishing multiple videos every week.
Updating branding becomes easier because changes only need to be made once inside the template.
Optimize Audio Settings Before Editing Begins
Audio cleanup consumes a surprising amount of editing time. Smart templates solve this issue in advance.
Prepare tracks with:
- Preloaded compressors
- EQ settings
- Noise reduction tools
- Loudness normalization presets
Good audio organization improves both editing speed and final production quality.
If you record with the same microphone regularly, save customized enhancement settings specifically for that setup.
Use Adjustment Layers for Faster Global Changes
Adjustment layers are essential for efficient editing.
Instead of applying effects individually to multiple clips, place corrections on a single adjustment layer above the timeline.
This method simplifies:
- Color grading
- Exposure fixes
- Sharpening
- Stylized looks
- Cinematic effects
Editors can modify entire sequences instantly without affecting individual clips.
This becomes extremely valuable when clients request revisions late in production.
Create Export Presets for Different Platforms
Every platform has unique export requirements. Switching settings manually wastes time and increases the risk of errors.
Prepare dedicated export presets for:
Popular Delivery Formats
- YouTube 4K
- TikTok Vertical Video
- Instagram Reels
- Facebook Ads
- Podcast Clips
- Client Review Files
Include optimized bitrate and resolution settings to maintain quality while reducing render size.
Modern editors often maintain separate presets for short-form and long-form content.
Keep Templates Updated as Your Workflow Evolves
An editing template should improve continuously.
As you discover better transitions, audio settings, or organizational systems, update your master template accordingly.
Many professionals review their workflow every few months to remove outdated assets and improve efficiency.
Pay attention to repetitive tasks during editing sessions. If something feels repetitive, automate or template it.
The goal is reducing friction between creativity and execution.
Avoid Overcomplicating Your Template
A common mistake is stuffing templates with unnecessary effects, graphics, and assets.
An overloaded project can slow down software performance and create confusion.
Focus on elements you genuinely use frequently.
A lightweight and organized template performs better than a massive project filled with unused materials.
Simplicity often leads to the fastest workflows.
Cloud Backups and Shared Templates Improve Team Collaboration
For agencies and production teams, shared templates create consistency across editors.
Store templates using cloud platforms so everyone accesses the latest version.
Benefits include:
- Faster onboarding
- Consistent branding
- Easier collaboration
- Reduced project setup time
- Better organization across departments
This approach is increasingly important as remote editing teams continue growing in 2026.
Final Thoughts
Building an efficient video editing template is one of the smartest investments any creator can make. Instead of wasting hours rebuilding the same project structure repeatedly, templates allow editors to focus entirely on creativity and storytelling.
A well-designed workflow improves speed, consistency, collaboration, and production quality. Whether you edit YouTube videos, social media content, documentaries, or client projects, having a reusable system creates a major competitive advantage.
As content demand continues rising, editors who streamline their workflow will produce more content in less time while maintaining professional standards.
The best editing template is not the most complicated one. It is the one that removes unnecessary steps and lets creativity flow without interruption.